
STEP 1: Install Necessary Drupal Modules
In order to import some JSON data, you first need these modules installed and enabled.
- Ctools – https://www.drupal.org/project/ctools
- Feeds – https://www.drupal.org/project/feeds
- Job Scheduler – https://www.drupal.org/project/job_scheduler
- Feeds JSONPath Parser – https://www.drupal.org/project/feeds_jsonpath_parser
STEP 2: Create The Content-Type
To import content from another site, you need to create the content type so the data can be saved on your website. The fields from the JSON source should be the same as your content type on your site depending on your needs. For example, if the JSON data array looks like this:
{
"name": “Johny John”,
“date_joined”: 02/12/1988
"title": “Teacher",
"department": “Astrophysics",
"email": “[email protected]”,
}
The fields in your content type should look something like this:
- name – Text field
- date_joined – Date field
- title: – Text field
- department – Text field
- email – Email field
Depending on where you download the data, there could be just a few or hundreds and thousands of arrays. There is also a great tool to get a view of your JSON file, it’s called “REST Console” for Chrome. (There are similar apps for all other browsers). REST Console will help you fetch the JSON data and display it in front of you. (See image below) This is valuable to get to the data field names and context for configuring the JSON Feeds Import.

Now that the Content-Type is created, configure the Feeds Importers.
STEP 3: Configure Feeds Importers
(a) The first configuration page in feeds is the Basic Settings.
- Name & Description: Self-explanatory, simply the name of what you are importing.
- Attach to content type:
- If a standalone form is selected, import the data.
- If a content type is selected, you must create a node of that content type to import data.
- Periodic Import: Run the import on regular basis, by using cron.
(b) The second is the Fetcher settings.
“Where should I get the data from?” is what the fetcher is saying. On the Fetcher page, there is a menu of selections that you can choose from depending on your demand. the two most common are “File Upload” and “HTTP Fetcher”(URL).
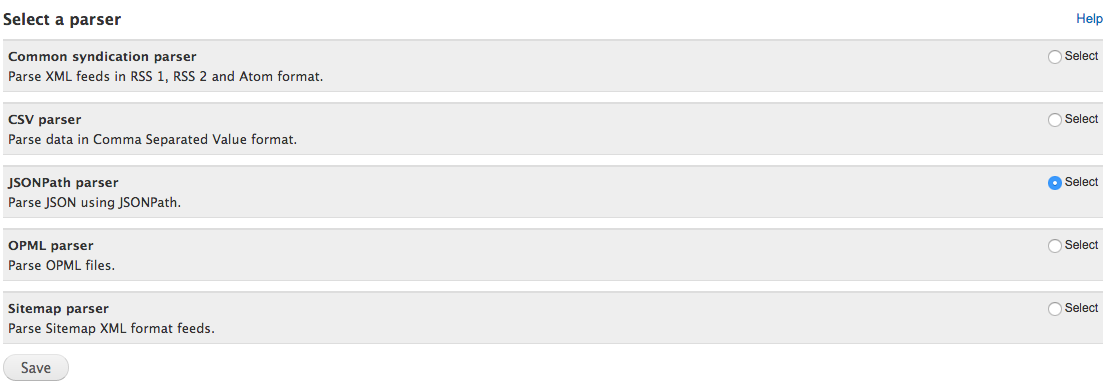
(c) The third is the Parser settings.
“How should I read and interpret this data?” is what the parser is saying. This part is important because it’s where you say to the website that it is going to be a JSONPath parser. (see image below)
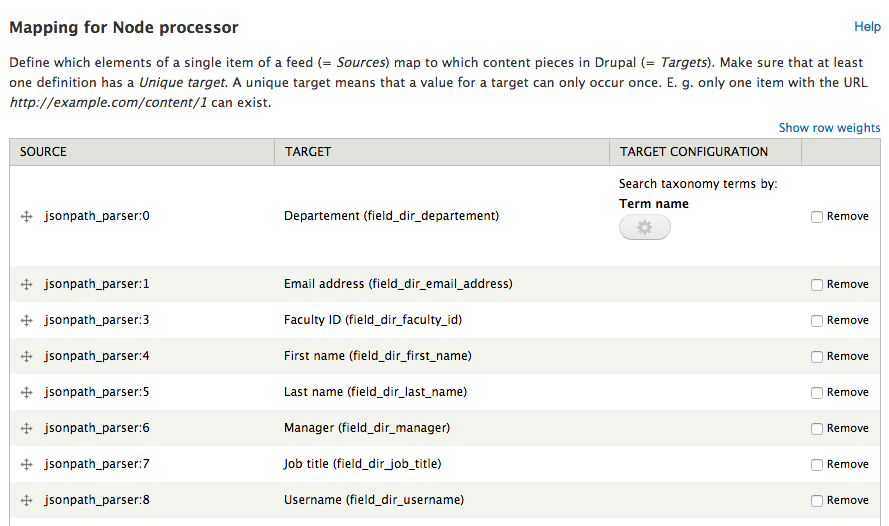
STEP 4: Create Feed Mapping
Now before going in and configuring the JSONPath parser settings, you first need to create the feed mapping.
For the source always select jsonpath_parser. The numbers will increment automatically like in the picture below. Do this for all your content type fields.
STEP 5: Go to JSONPath parser settings.
Once the mapping is done. Go to the JSONPath parser settings. You should see something like the picture below.
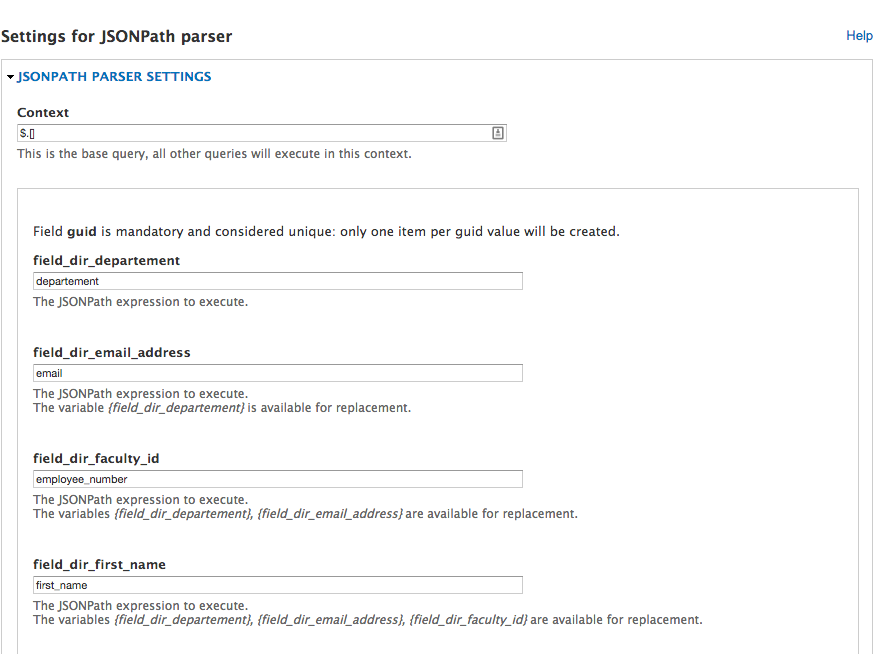
In this picture above you should see all the content type fields in order just like on the mapping page. In the text box, you need to enter the JSONPath field by referencing the JSON key like in the first picture. As for the context text box, this variable depends on how your JSONPath output is constructed. For this example it’s pretty simple, there is only one context so you put
“ $.[] “
Here is a page where you could find more info about the Context: https://www.drupal.org/node/1059152 .
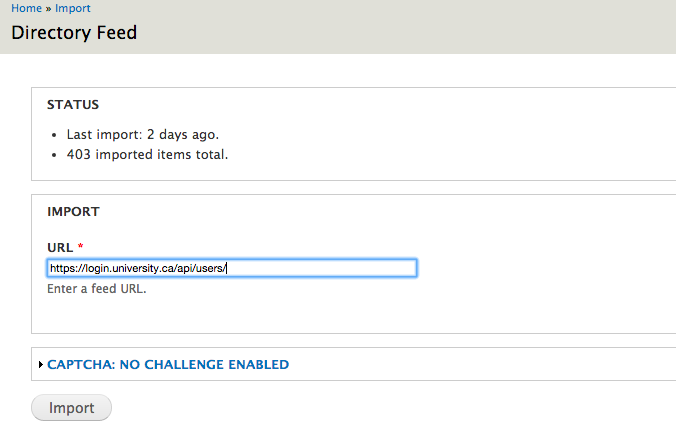
STEP 6: Go to the import page
Finally, you should be ready to import JSONPath Feeds. Go to the import page and add the import file or add the feed URL just like below.
Once the import is done you should see your new nodes created on your content page.
If you ever need any additional support on a project, our Drupal Development team does a lot of backend work for other agencies. Give us a call!