Have you ever had a list of related items, related by say by a taxonomy term or another node, and needed some way to sort that list, fully, or even partially? If so, there are a few good views modules out there to help you out.
The Nodequeue Module
My first introduction to setting up a custom sort on a list of content was to use the Nodequeue module. Nodequeue is a multi-faceted module which has a lot of queue/listing functionality. One of which is integrating with views.
I’ll go through the steps necessary for setting up a nodequeue and linking it to your view to have it use your sorting.
Once you’ve got Nodequeue installed, creating a new nodequeue is straightforward. Go to Structure -> Nodequeues -> Add simple queue. For most nodequeues, you just need to enter a name, select the content types you want available to your queue, and that’s it.
Now that we’ve got a queue, we need to add content to it. You can do this two ways. I’ll start with the individual node method. Go to your content overview page, click edit for a node of type you just made available to your nodequeue. You’ll now notice the Nodequeue tab. Click on the Nodequeue tab, and then click Add to queue. That’s it. Now add as many nodes as you need custom sorted to your nodequeue.
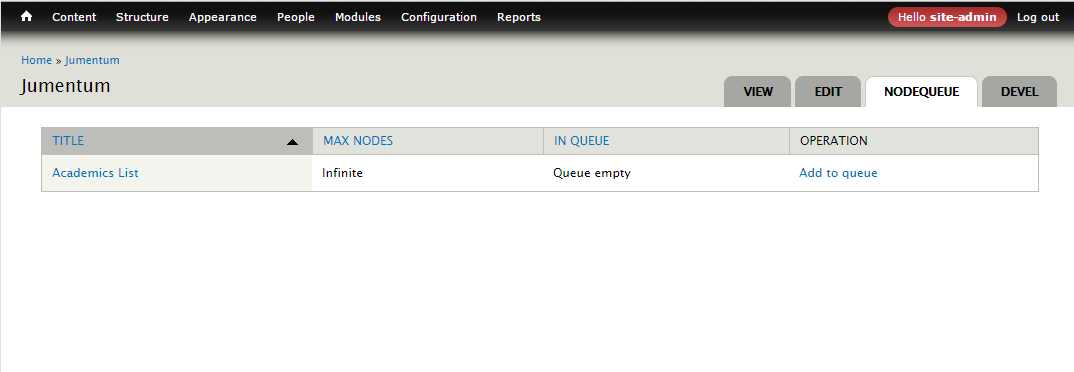
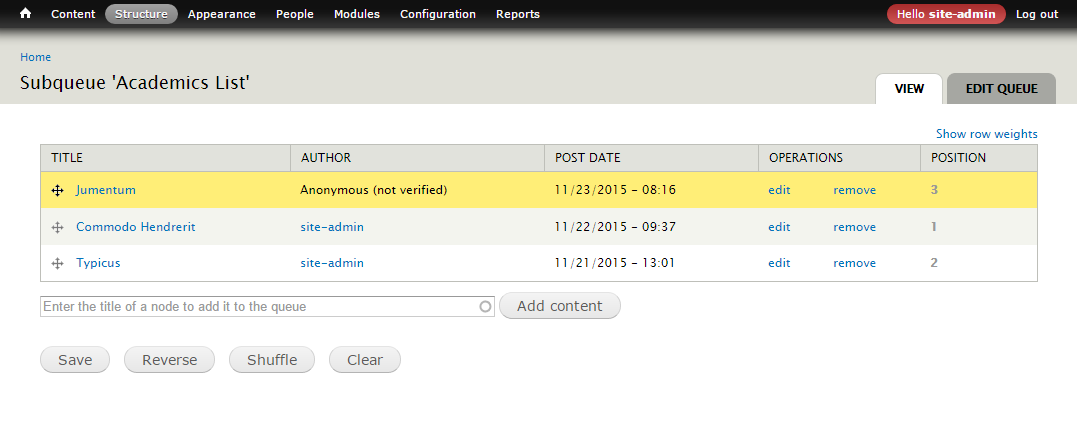
Now that we’ve got all the content added to the list, we can sort it. Go to Structure -> Nodequeues. Click view for your nodequeue. You can sort the content in your list however you like. You can also add content to your queue via an autocomplete text field on this form.
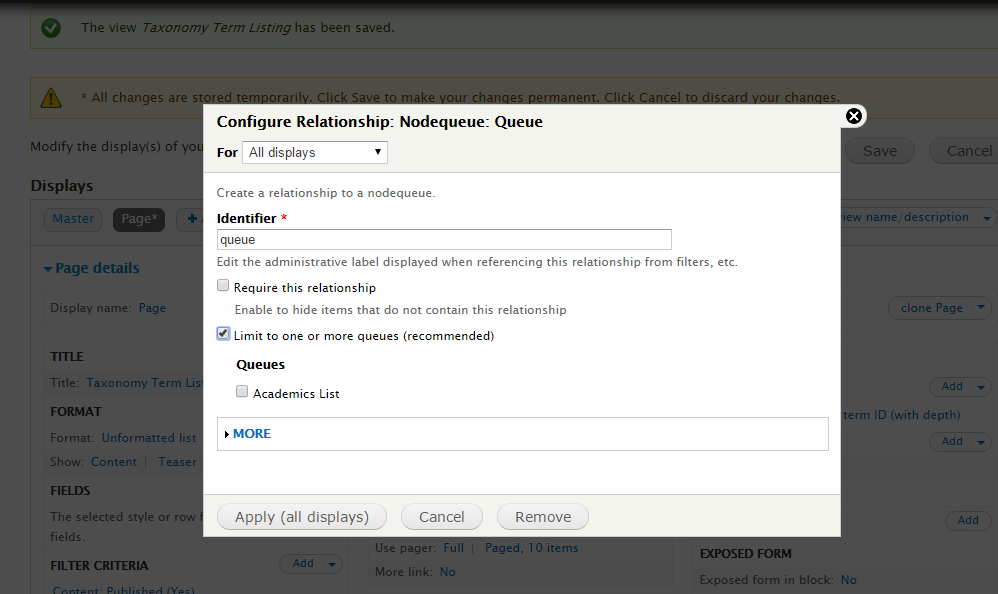
Next, we need to link your view and the nodequeue. Edit your view. If needed, open the Advanced tab on the right. Click Add under Relationships. Click Filter and select Nodequeue. Check the Nodequeue: Queue option, then Apply. Check Limit to one or more queues (recommended), and select your nodequeue. Do not click Require this relationship unless you want to restrict your list to the nodequeue.
Now we need to apply the nodequeue’s sorting. Click Add under Sort Criteria. Click Filter and select Nodequeue. Check Nodequeue: Position in nodequeue and other parameter if you didn’t require the relationship, or Nodequeue: Position if you did, then click Apply. If you already had a sort on your view, click Rearrange under Sort Criteria and move the Nodequeue sort to the top. If not, it’s a good idea to have a backup sorting for the items you didn’t specifically sort.
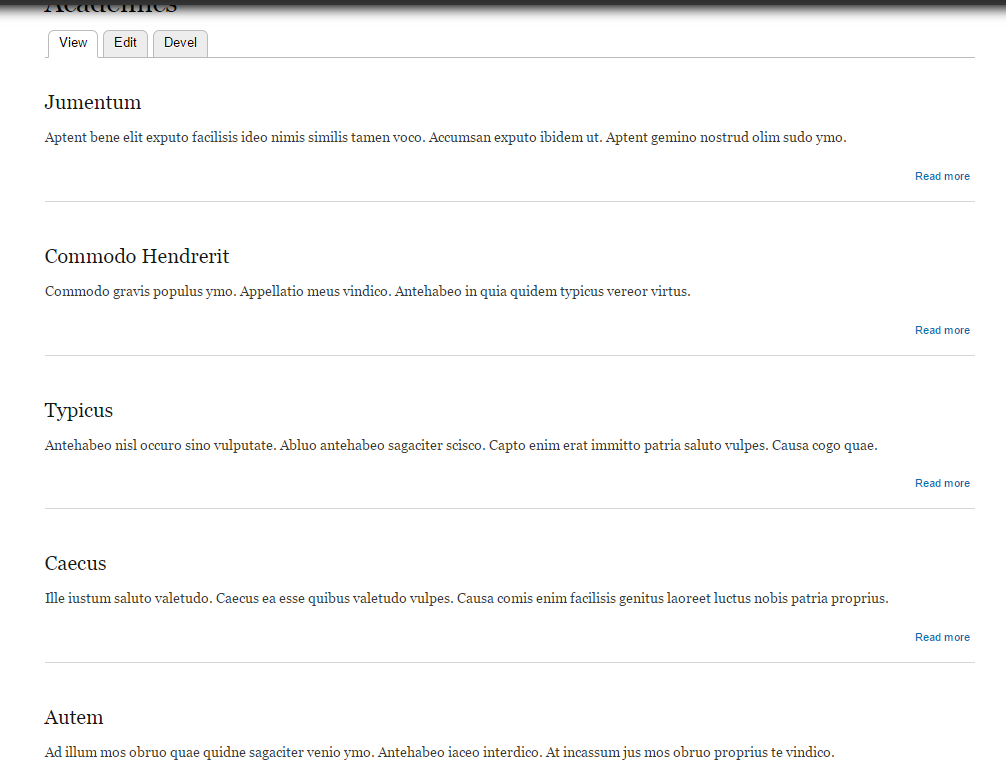
Click Save on your view, and now check out your newly sorted list.
Draggable Views
Now as much as that does get the job done, I find that to be a lot of work to be able to sort a pre-existing list. Luckily I ran across DraggableViews, whose sole purpose is to allow you to manually sort a pre-existing view.
I’ll go through the steps needed to get things all set up.
After enabling DraggableViews, edit your view. Add a new Page.
Change the Format to Table, make the settings For: this page (override). Leave settings as default.
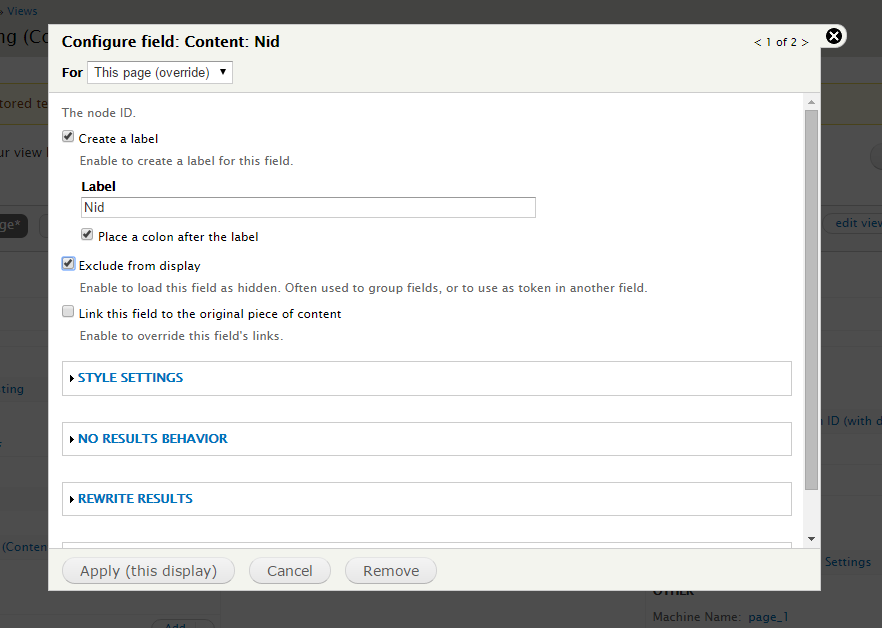
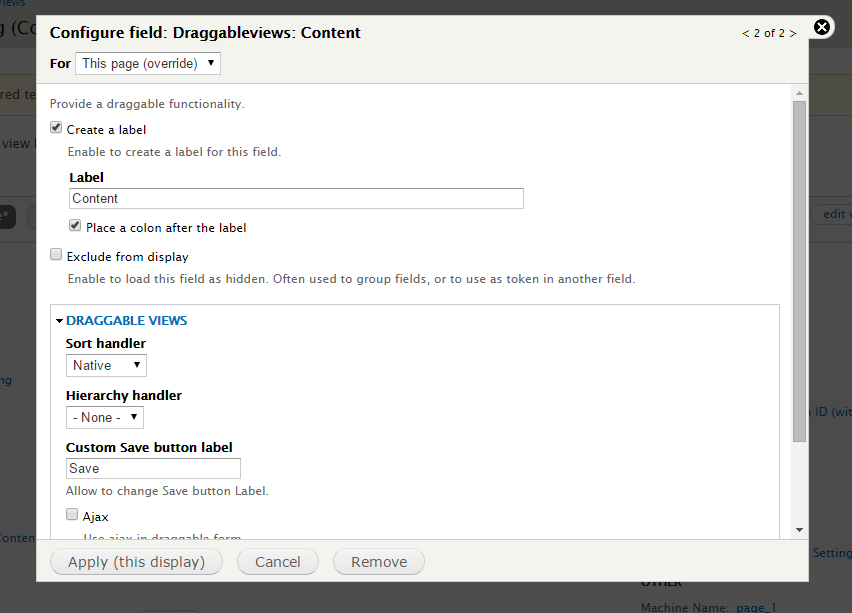
Add the following fields to the display: Content: Nid, and Draggableviews: Content. When adding the fields, make sure you change the settings For: this page (override). In the Configure field settings, check Exclude from display for Content: Nid.
Leave the defaults for Draggableviews: Content.
If you had any other fields in your display, you can probably remove all of them but the Content: Title fields, and the two that you just added. When sorting the list, you don’t need it to be cluttered.
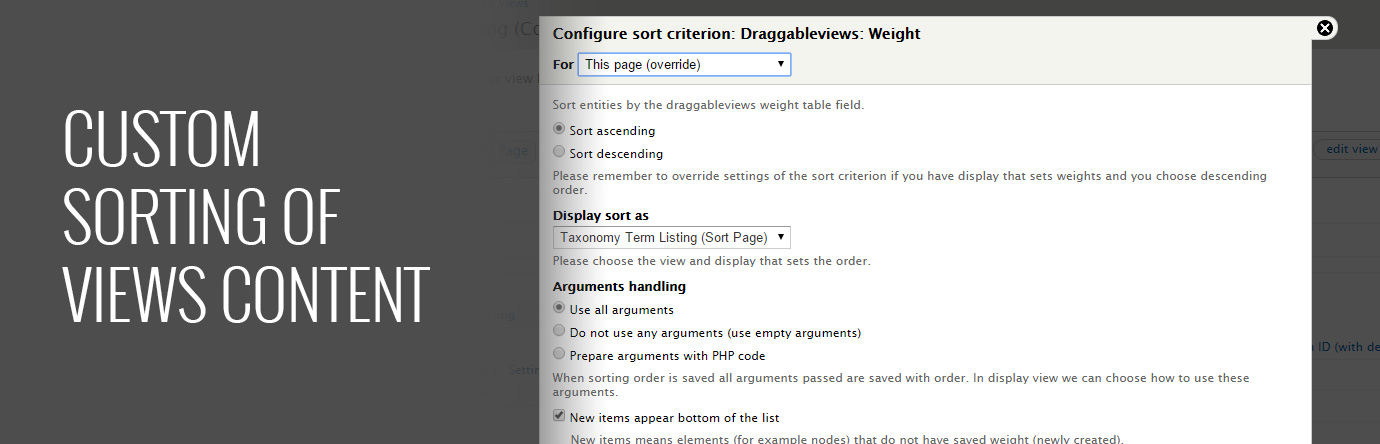
Next, you need to add the sorting. Click Add under Sort Criteria. Choose Draggableviews: Weight. Change it to be for this page (overridden). If you had other sort criteria, move Draggableviews to the top.
Depending on your needs, and how you want to sort, you may want to turn off the pager, and choose to Display all Items, for this display. I find it makes sorting a lot easier, and gives you a broader view of the list, especially if it’s a few pages.
There are a few more optional things you might want to do to help with User Experience. You can change the Display names to help you remember which is your actual display, and which is your sorting page. You can change the title of the sorting display. And you could add a link in the header of your sorting display, linking back to your main listing page.
The final step for the sorting view is to set a path for the page. Set it to whatever makes sense for you. If the list I’m sorting is already a page, I will usually just use that with /sort appended to the end. Once you’ve set your path, save your view.
Now that we’ve got the sorting set up. It’s time to get your original display to use it. On your original display, under Sort Criteria, click Add. Choose Draggableviews: Weight (just like with our sorting view). When configuring the settings, you will see the field Display sort as – this just sets which sorting data to use.
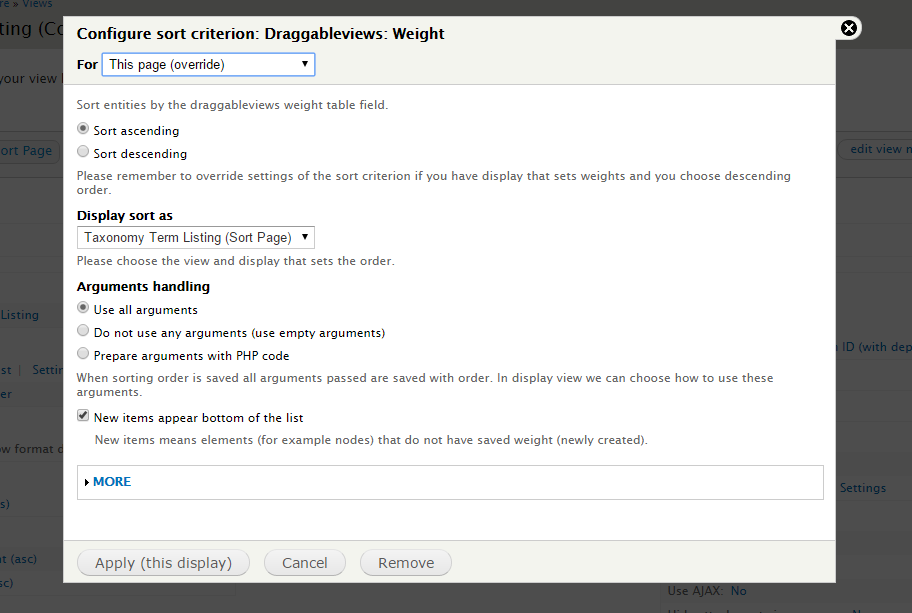
And you should only have option in that list right now. If you ever set up multiple displays with multiple sorting displays, this is where you’d link up each one to its proper sorting page. Now as before, if you had previous sorting, move the Draggableviews: Content field to the top of the list.
Save your view, and then test it out.
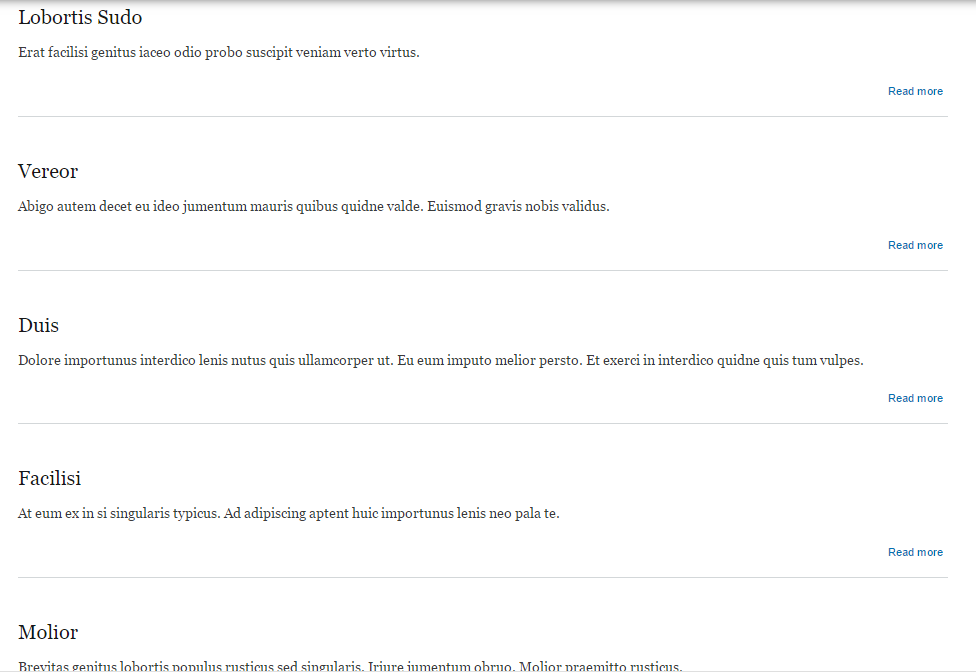
It should look something like this.
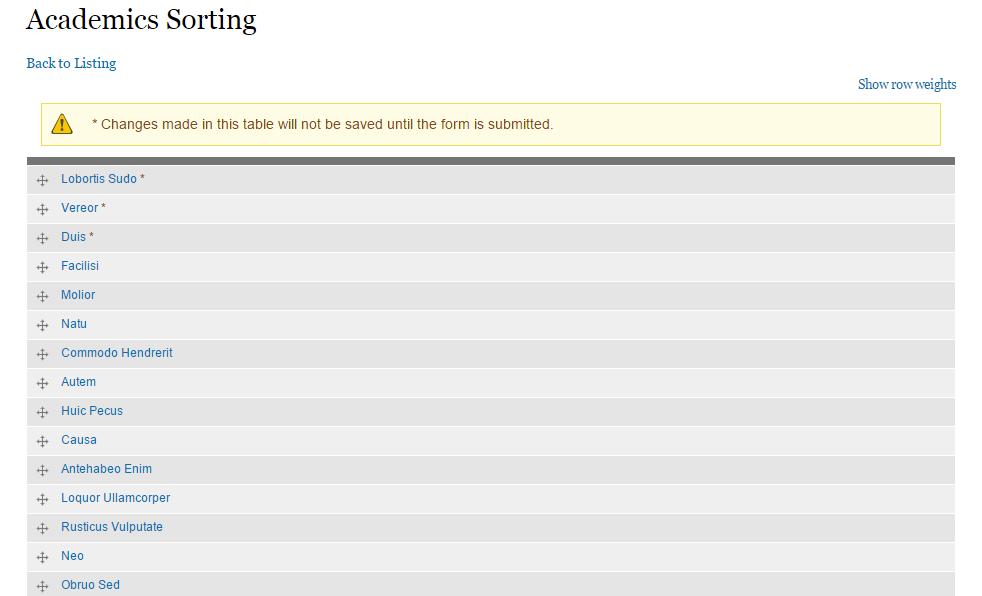
And then like this.